
Practical training on the use of capacitive instruments
Section outline
-
Experiments require techniques to accurately weigh the required amount of reagents and solutions or to dispense them quickly. Here we will learn how to use measuring pipette (1 mL) and micropipettes (10, 20, 200 and 1000 mL), which are commonly used in biochemistry and molecular biology experiments.
(1) Measuring pipet
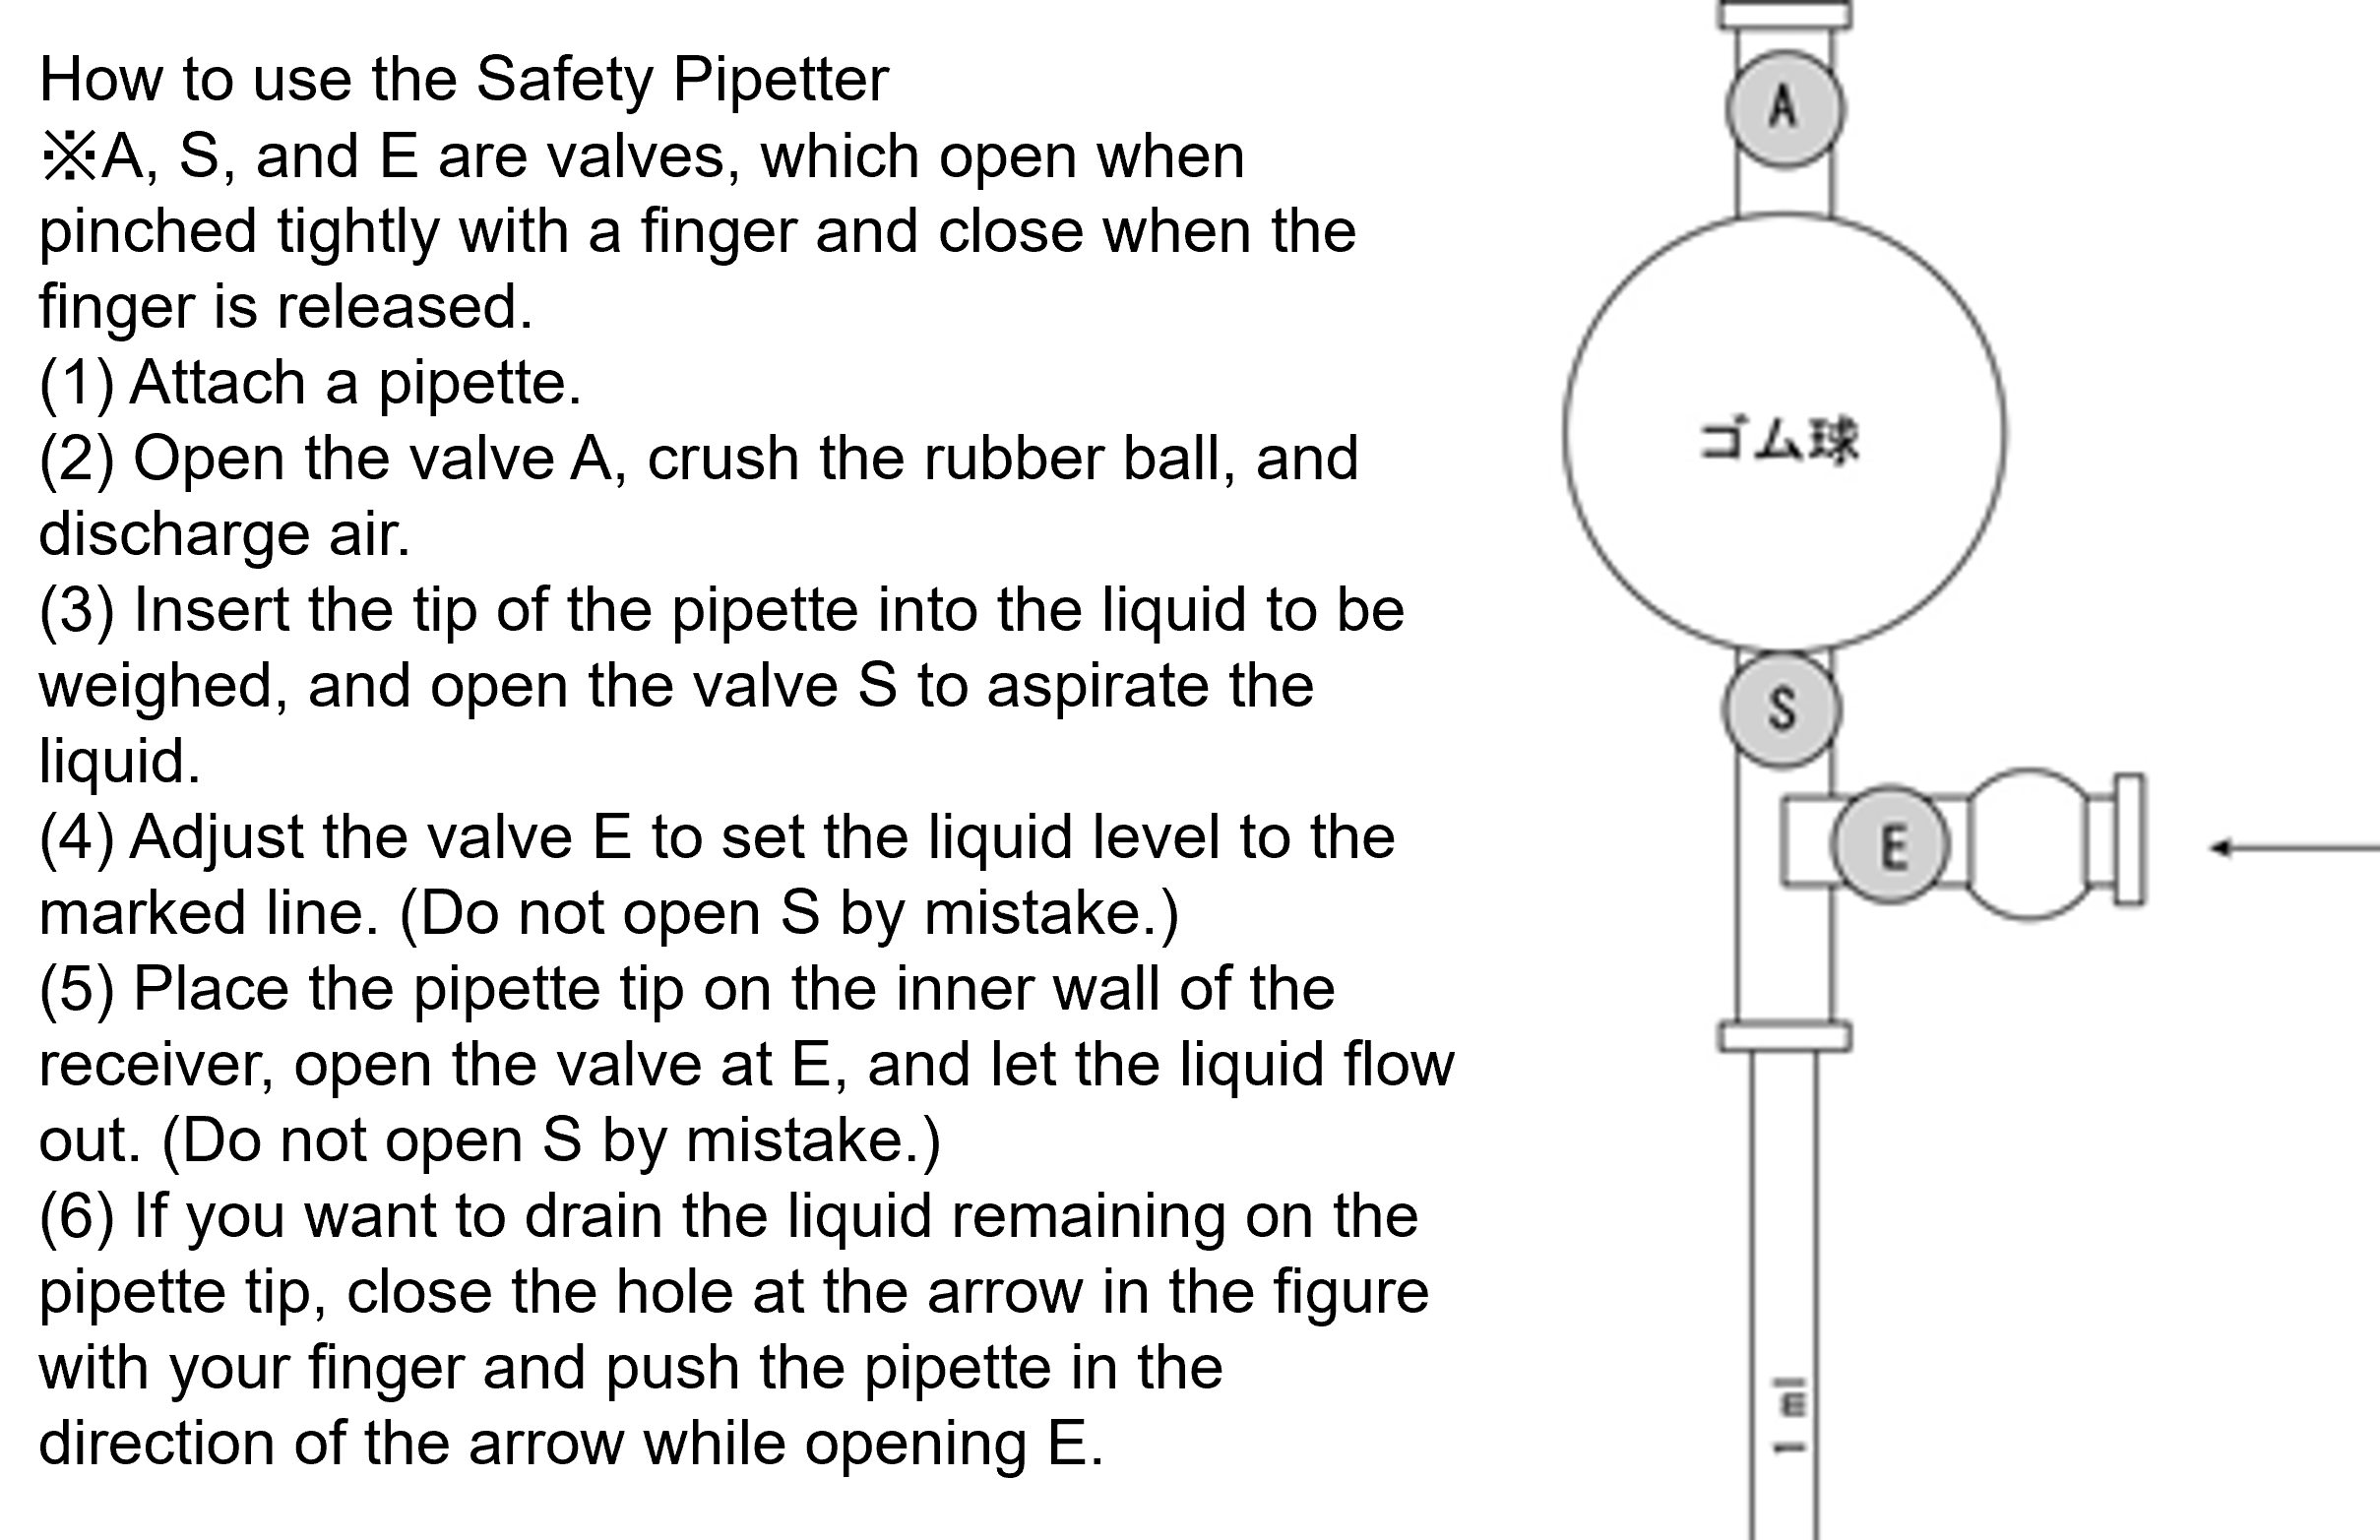
Different from a hole pipette, an arbitrary volume of liquid can be weighed into a glass tube with a narrow tip and graduated structure, but the accuracy is inferior to that of a hole pipette. It is convenient to use it when dispensing a liquid continuously into a plurality of containers in a predetermined volume, or the like. There are a "tip graduation type" with a graduation to the tip and a "middle graduation type" with no graduation at the tip (figure below). However, the latter cannot be used in a way of exhaling the whole amount of the sucked-up. Aspirate with the mouth and regulate the outflow of liquid with the index finger. When handling liquids harmful to the human body or culture fluid of microorganisms, etc., use a safety pipettor or an electric pipettor.
In order to accurately weigh the volume, the tip of the pipette must be kept in contact with the inner wall of the container while the liquid is aligned with the mark or while the liquid is flowing out to the receiver. Also, do not use a pipette with a chipped tip.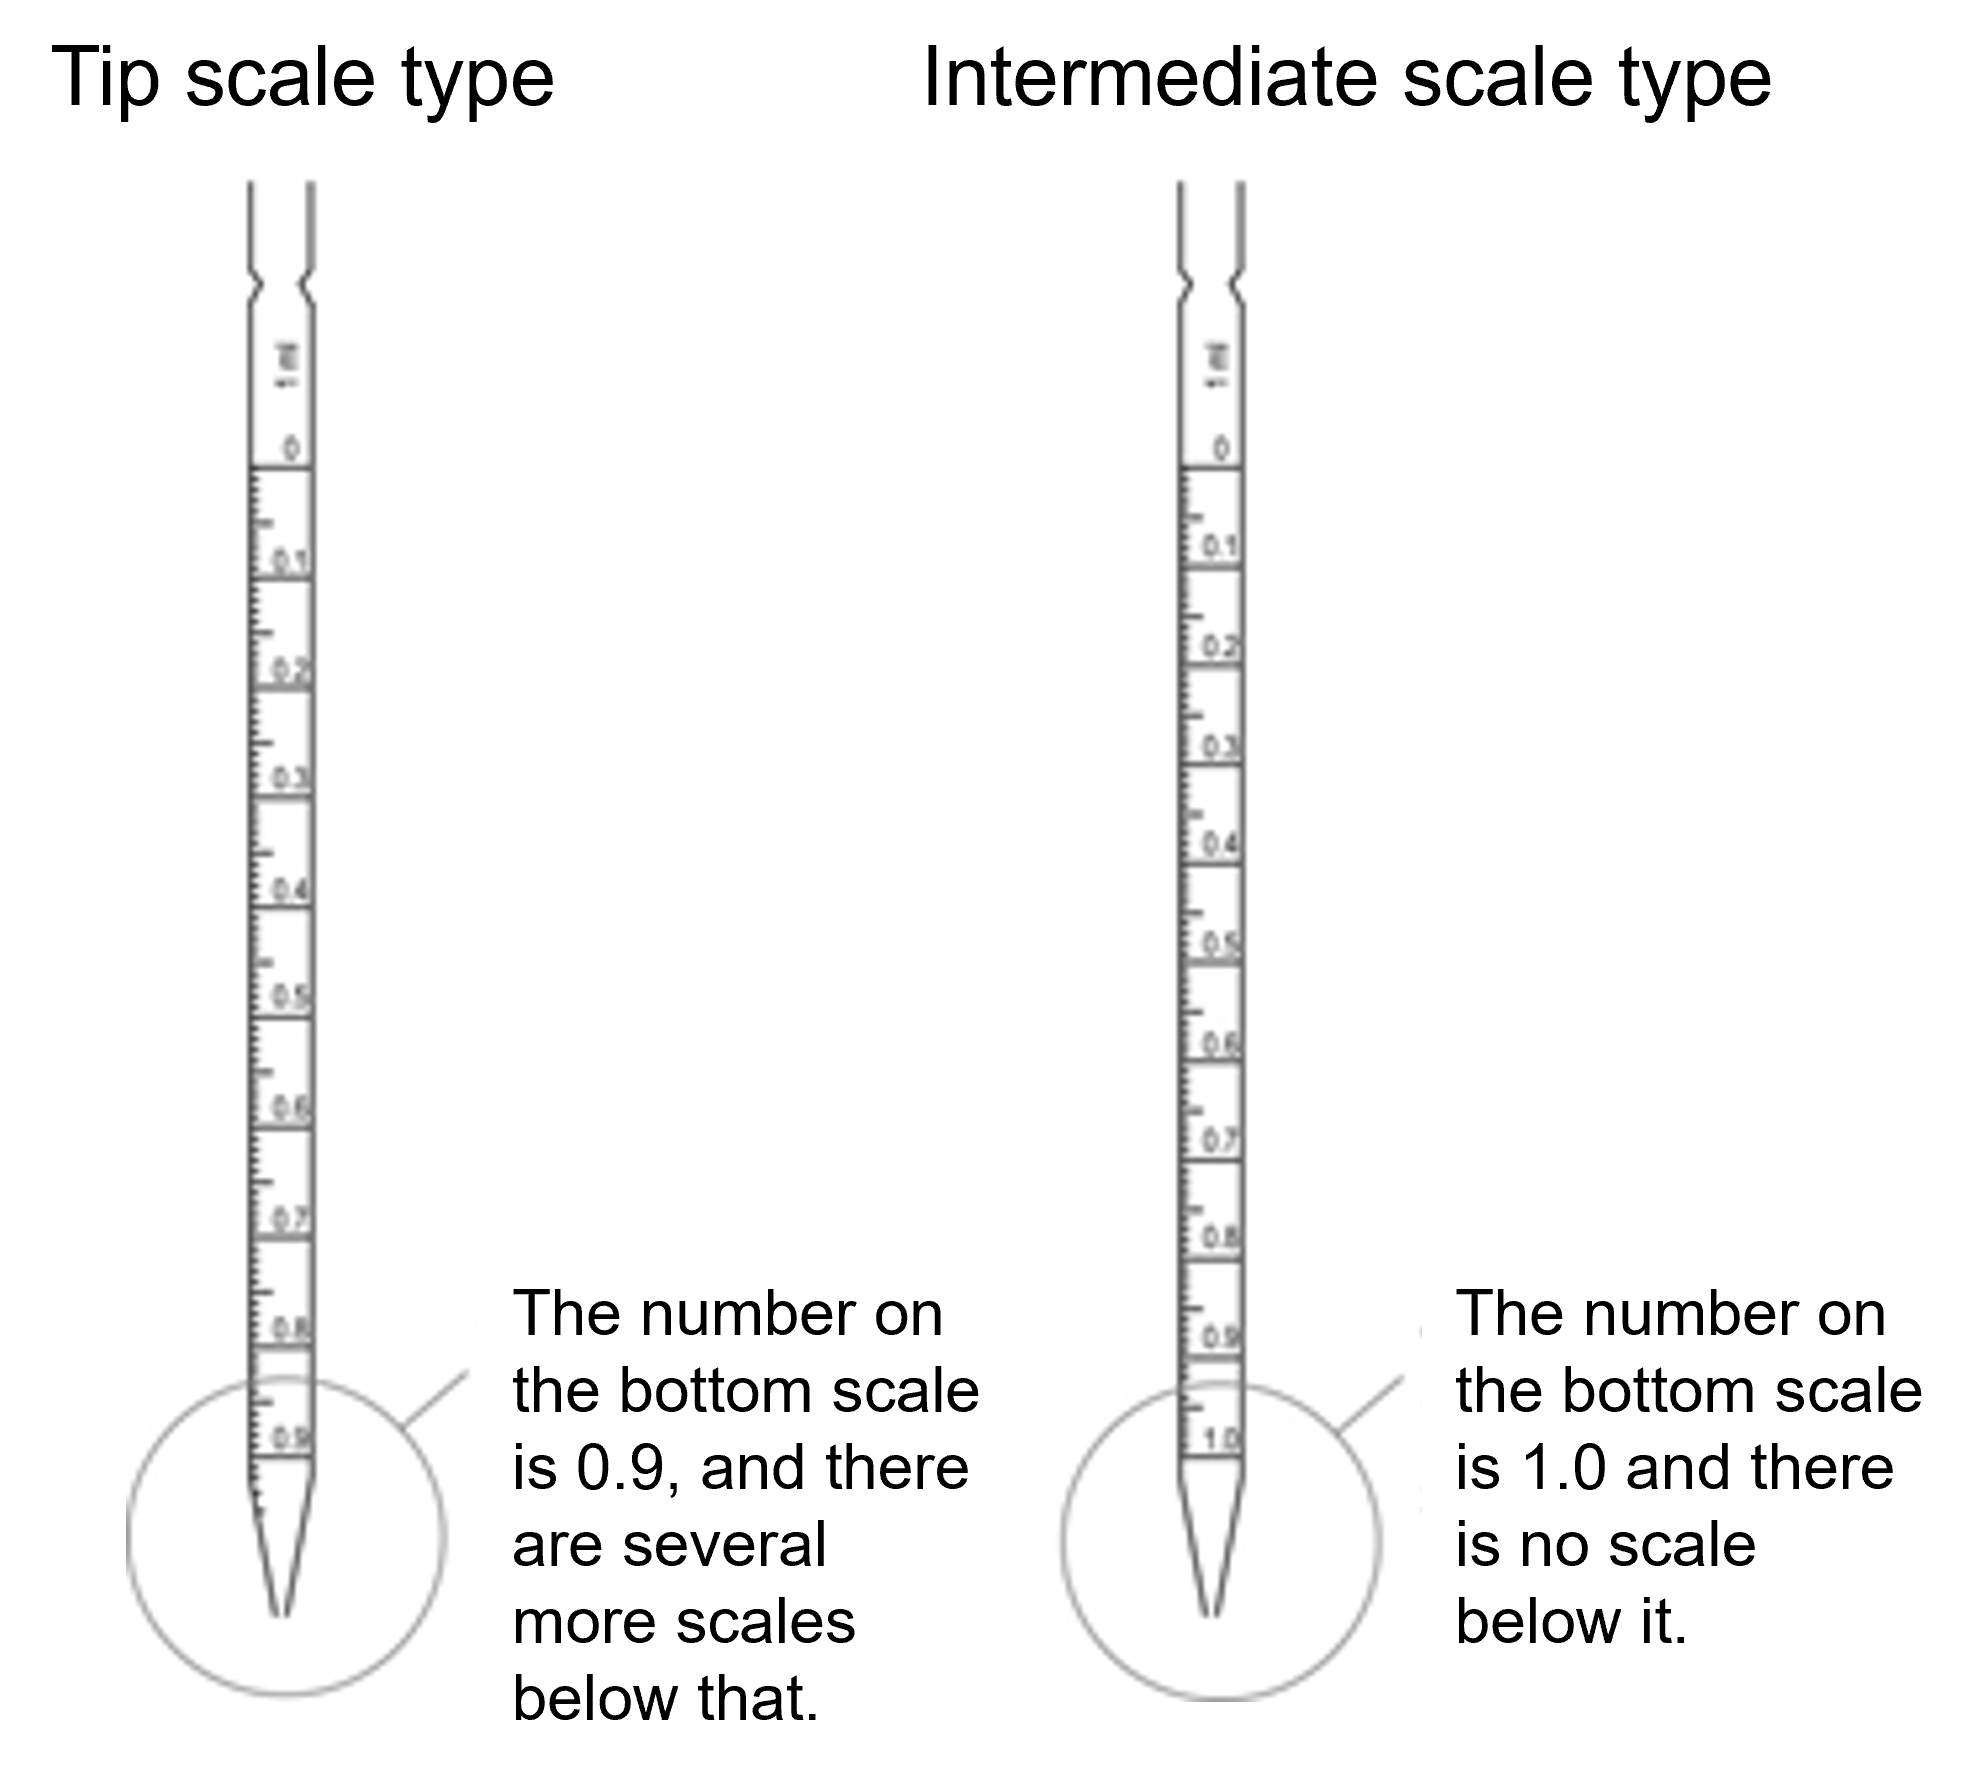
How to handle female pipettes (video)
[Experiment 1] Test for female pipette (10 mL)
(a) Place a 50-mL plastic tube on the weighing pan of the electronic balance as a receiver, and press TARE to clear the display to zero.
(b) The receiver is removed from the weighing pan, and the purified water is placed on the weighing pan with a volumetric pipette to a 1.00 mL receiver. The weight of the weighed water is read and recorded.
(c) (a) Perform the procedure (b) three times in total to obtain the average value.
(d) Similar measurements shall be made for 5.00 mL and 10.00 mL.
(e) The nominal error of the measuring pipette (10 mL) is generally ±0.1 mL. Make sure that the measurement results are within this error range. Also, consider whether or not there is a tendency for the error to change depending on the volume taken, if any.
Using the Electronic Balance (Video)(2) Micropipette
Here, a mechanical pipette capable of weighing a liquid of about 0.1 mL to 1 mL is referred to. There are pistons and cylinders inside, and any volume of liquid can be taken up by precisely adjusting the range of movement of the piston. The tip is fitted with a disposable nozzle called a pipette tip. Because very small amounts of liquid can be handled accurately and without waste, it is frequently used in molecular biology and biochemistry experiments. However, improper use easily deteriorates the internal parts and results in large errors. It is necessary to pay attention, because the appearance is normal even in such a condition. Further, since the portion above the pipette tip is repeatedly used without washing, contamination of the sample and the reagent tends to occur through this portion, and careful attention is required.
※ Do not contact the portion above the pipette tip with the container.
※ Never wick liquid above the pipette tip.
※ Do not point the tip upward.
The micropipettes are made of resin or metal. They should not be used in the handling of organic solvents, volatile strong acids, strong bases, etc., which evaporate vapors that corrode these components.
Micropipette Description (Video)
How to operate the micropipette (Movie)[How to handle] Failure to observe the underlined areas below will result in fluid being drawn into the unit.
(a) Capacity Settings
Turn the dial to set the desired volume. To increase the capacity, turn the scale slightly beyond it, and then adjust it to the desired scale. When reducing the volume, adjust directly to the scale. Never attempt to turn the dial beyond the settable range (0 mL or less or larger than the maximum capacity), as it will break.
(b) Firmly attach the pipette tip.
(c) The plunger (piston) can be pushed in two stages (Fig. 3) and operated with the thumb. a With the tip pushed into → b (never push into c at this time), insert the tip of the tip into the fluid to be weighed (about 1 to 3 mm in depth; Fig. 4-①).
(d) Decrease the force to hold the plunger. Slowly return to → a (critical!) with the force of the spring to draw the set volume into the tip (Fig. 4-②).
(e) The tip of the tip is brought into contact with the inner wall of the receiver, and the plunger is slowly pushed into the a → b (particularly for highly viscous liquids) to discharge the liquid (Fig. 4-③④).
(f) The liquid remaining at the tip of the pipette tip is drained by pushing the plunger further to c (Fig. 4-⑤). After draining, weaken the force to hold the plunger and slowly return it to the position a. At this time, the tip of the tip must be above the liquid level of the liquid in the receiver.
(g) On top of the pipette tip disposal container, press the eject button to remove the tip. (Fig. 4-⑥)Examples of operations that must not be performed (movies)[Experiment 2] Micropipette test
(a) Perform the test on 10 mL, 20 mL, 200 mL, and 1000 mL micropipettes as described in [Experiment 1]. Record the production number of the micropipette in the assay. For 10 mL and 20 mL micropipettes, use a 0.2 mL microtest tube as the receiver and an electronic balance that can measure up to 0.1 mg. For a 200 mL micropipette, use a 1.5 mL microtest tube as the receiver. In each case, close the lid when weighing. Measure the set capacity three times for each volume as shown below, and calculate the average value.
Group A: 10 mL micropipette: 1.0, 5.0, 10.0 mLGroup B: 20 mL micropipette: 2.0, 10, 20.0 mL
Group A: 200 mL micropipette: 20, 100, 200 mL
Group B: 1000 mL micropipette: 100, 500, 1000 mL
(b) The following are the nominal errors of the micropipettes used in this experiment. Check that the measurement results of the team are within the nominal error range.
Disassembly and assembly of micropipette (reference)